
Beginner-Friendly Recipe
No-Bake Peanut Butter Bars
These no-bake peanut butter bars are rich, simple, and perfect when you want a homemade dessert without turning on the oven. A buttery peanut butter base gets topped with melted chocolate for an easy treat that chills into clean, sliceable bars.
Mistakenly Smart Note
AI helped shape the structure of this recipe, but the final version was reviewed for real-life kitchen use. These no-bake peanut butter bars are meant to be simple, practical, and beginner-friendly, with clear steps, common pantry ingredients, and helpful tips before you start.
No-Bake Peanut Butter Bars
Estimated reading time: 24 minutes
Key Takeaways
- No-Bake Peanut Butter Bars are simple desserts made with peanut butter and chocolate, requiring no baking.
- The recipe includes easy steps: mix ingredients, press into a pan, pour chocolate on top, and chill until firm.
- These bars are great for beginner bakers and are perfect for potlucks or quick desserts.
- Store in an airtight container in the fridge for up to a week, or freeze for longer storage.
- Avoid common mistakes like overheating chocolate or slicing too soon to ensure clean cuts.
Table of contents
Quick Answer
No-bake peanut butter bars are an easy dessert made with peanut butter, melted butter, powdered sugar, graham cracker crumbs, and a simple chocolate topping. Mix the base, press it into a pan, cover it with melted chocolate, chill until firm, then slice into bars.
Why This Recipe Works
These no-bake peanut butter bars taste like a homemade peanut butter cup, but they are much easier to make. There is no oven, no mixer, and no complicated timing.
The graham cracker crumbs help the peanut butter layer hold its shape, while powdered sugar keeps the texture smooth. The melted chocolate topping adds the classic chocolate-peanut butter flavor in an easy bar form.
They are great for beginner bakers, holiday trays, potlucks, after-school treats, or quick desserts when you already have peanut butter in the pantry.
Recipe Snapshot
Prep time: 15 minutes
Cook time: 0 minutes
Chill time: 1 hour
Total time: 1 hour 15 minutes
Servings: 16 bars
Difficulty: Easy
Best for: Quick desserts, no-bake treats, potlucks, beginner dessert recipes
Main tools needed: Mixing bowl, spatula, 8×8-inch pan, microwave-safe bowl or small saucepan
Ingredients
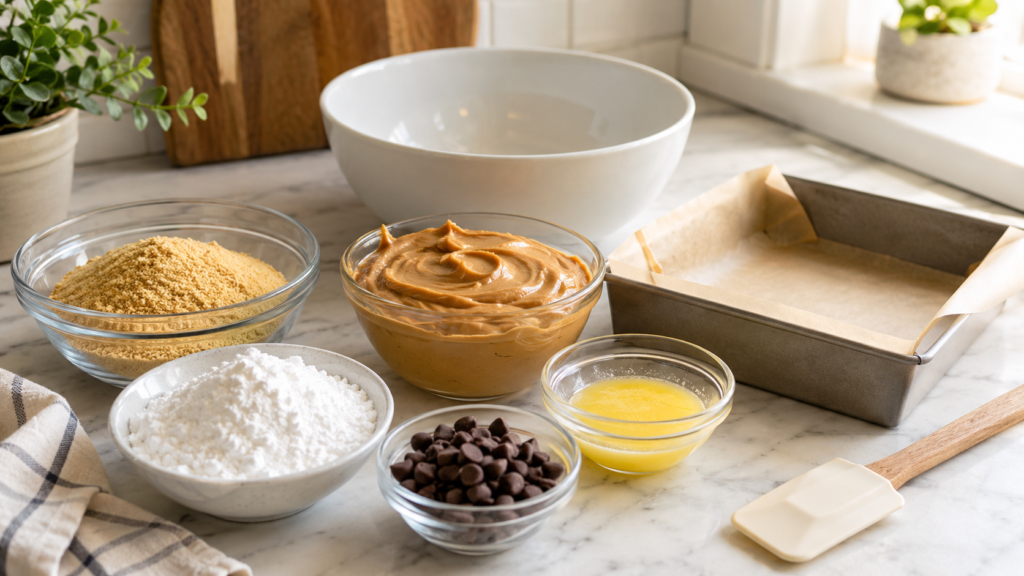
For the Peanut Butter Base
1 cup creamy peanut butter
1/2 cup unsalted butter, melted
1 3/4 cups powdered sugar
1 1/2 cups graham cracker crumbs
1 teaspoon vanilla extract
1/4 teaspoon salt, optional but helpful if using unsalted peanut butter
For the Chocolate Topping
1 1/2 cups semi-sweet chocolate chips
2 tablespoons creamy peanut butter
How to Make No-Bake Peanut Butter Bars
1. Prepare the Pan
Line an 8×8-inch baking pan with parchment paper, leaving a little overhang on two sides. This makes the chilled bars easier to lift out and slice.
2. Mix the Peanut Butter Base
In a large mixing bowl, stir together the peanut butter, melted butter, vanilla extract, and salt.
Add the powdered sugar and graham cracker crumbs. Stir until the mixture is thick, soft, and evenly combined.
3. Press Into the Pan
Transfer the peanut butter mixture to the prepared pan. Press it firmly into an even layer with a spatula or clean hands.
Take a minute to smooth the top before adding the chocolate. This helps the finished bars look cleaner.
4. Melt the Chocolate Topping
Add the chocolate chips and 2 tablespoons peanut butter to a microwave-safe bowl.
Microwave in 20 to 30 second intervals, stirring between each one, until smooth. Stop once the chocolate is mostly melted, then stir until fully smooth.
5. Spread the Chocolate
Pour the melted chocolate over the peanut butter layer. Spread it evenly to the edges.
6. Chill Until Firm
Refrigerate the bars for at least 1 hour, or until the chocolate is set and the base feels firm.
7. Slice and Serve
Lift the bars out of the pan using the parchment paper. Let them sit at room temperature for 5 to 10 minutes before slicing so the chocolate topping is less likely to crack.
Cut into 16 squares and serve.
Tips Before You Start
Use creamy peanut butter for the smoothest texture. Natural peanut butter can work, but it should be stirred very well before measuring.
Press the base firmly into the pan. A loose base can crumble when sliced.
Do not rush the chill time. The bars need time to firm up so they cut cleanly.
For neater slices, use a sharp knife and wipe it clean between cuts.
Easy Swaps
Use crushed vanilla wafers or digestive biscuits instead of graham crackers.
Add 1/4 cup mini chocolate chips to the peanut butter base for extra chocolate flavor.
Use crunchy peanut butter or sprinkle chopped peanuts over the chocolate before chilling.
Swap semi-sweet chocolate chips for milk chocolate chips if you want sweeter bars.
Use gluten-free graham-style crumbs and check labels on packaged ingredients to make the recipe gluten-free.
What to Serve With It
These bars are rich, so they pair well with simple drinks and lighter sides.
Try them with cold milk, hot coffee, iced coffee, vanilla ice cream, fresh strawberries, or banana slices.
They also work well on a dessert tray with brownies, cookies, or rice cereal treats.
Storage and Freezing
Store no-bake peanut butter bars in an airtight container in the refrigerator for up to 1 week.
For longer storage, freeze them in a freezer-safe container for up to 2 months. Place parchment paper between layers so they do not stick together.
Let frozen bars thaw in the refrigerator, or let them sit at room temperature for a few minutes before serving.
Because these bars contain butter and chocolate, avoid leaving them out for long periods in a warm kitchen. Refrigerate leftovers within 2 hours.
Common Mistakes
Using warm chocolate on a very soft base
If your kitchen is warm, chill the peanut butter base for 10 minutes before adding the chocolate topping.
Overheating the chocolate
Chocolate can become grainy if overheated. Melt it slowly and stir often.
Guessing on the crumbs
Too few crumbs can make the bars soft. Too many can make them dry. Measure the crumbs after crushing.
Slicing straight from the fridge
Very cold chocolate can crack. Let the bars sit for 5 to 10 minutes before cutting.
FAQ
Can I make these no-bake peanut butter bars ahead of time?
Yes. These bars are a great make-ahead dessert because they need time to chill. You can make them a day in advance and store them covered in the refrigerator.
Can I use natural peanut butter?
Yes, but the texture may be softer. Stir natural peanut butter very well before measuring. If the mixture seems too loose, add a few extra tablespoons of graham cracker crumbs.
Can I make these without graham crackers?
Yes. You can use crushed vanilla wafers, digestive biscuits, or similar crisp cookies. The flavor will change slightly, but the bars should still hold together.
Why did my chocolate crack when slicing?
The chocolate was probably too cold. Let the bars sit at room temperature for 5 to 10 minutes, then slice with a sharp knife.
Do these bars need to be refrigerated?
Yes. Refrigeration helps them stay firm and fresh. They can sit out briefly for serving, but leftovers should be stored in the fridge.
Final Notes
These no-bake peanut butter bars are simple, rich, and beginner-friendly. They are especially useful when you want a dessert that tastes like a peanut butter cup but does not require baking.
Keep them chilled, slice them small, and use the parchment paper trick for easy serving.
Helpful Recipe Resources
Trusted Food, Cooking, and Recipe References
Mistakenly Delicious uses AI-assisted workflows, but useful recipes still need common sense, food safety checks, and reliable cooking references. These resources can help with ingredients, nutrition, safe temperatures, and the AI workflow behind this site.
Ingredient Data
USDA FoodData Central
A useful reference for checking ingredient and nutrition data when reviewing recipes.
Visit Resource →Cooking Help
Nutrition.gov Cooking Tips
Beginner-friendly guidance for meal prep, cooking basics, shopping, and planning.
Visit Resource →Food Safety
Safe Cooking Temperatures
A helpful food safety chart for checking safe internal temperatures for chicken, meat, seafood, and leftovers.
Visit Resource →Creator Workflow
TechnofluxAI
The AI workflow and creator systems site behind Mistakenly Delicious.
Visit TechnofluxAI →About Mistakenly Delicious
AI-Assisted Recipes for Real-Life Kitchens
Mistakenly Delicious creates beginner-friendly recipes, ingredient swaps, kitchen tips, and easy meal ideas with help from AI-assisted workflows. Every post is designed to be practical, readable, and useful for real home cooks.
Recipes may be created with AI assistance, but they should always be reviewed for ingredient logic, cooking times, food safety notes, substitutions, and real-world usefulness before publishing.